Propagating Amaryllis
-
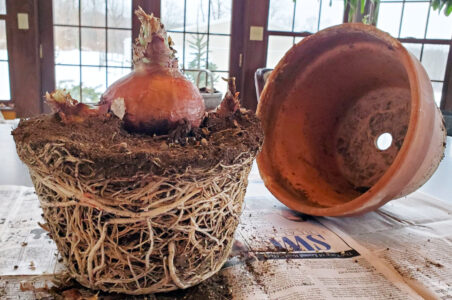
- PHOTO BY DEBRA BURROWS A large Amaryllis bulb with extensive root growth and several bulblets.
-
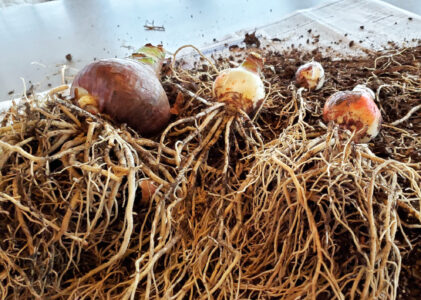
- PHOTO BY DEBRA BURROWS The original bulb and bulblets separated with roots preserved.
-

- PHOTO BY DEBRA BURROWS The repotted bulb and bulblets.

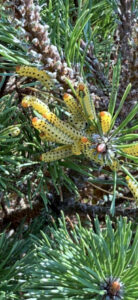
PHOTO BY DEBRA BURROWS A large Amaryllis bulb with extensive root growth and several bulblets.
In November of 2020, I wrote about caring for Amaryllis (Hippeastrum spp.) bulbs, which are popular winter holiday gifts. In this column, I will go beyond caring for them and focus on propagating them.
Propagation refers to the process of growing additional plants from the parent plant. In the case of Amaryllis, propagation can be surprisingly easy.
Keeping the plant healthy and growing after it has flowered is key to having it bloom in subsequent years and is important for propagation as well. For a refresher on doing that, please visit: www.lockhaven.com/news/garden/2020/11/growing-tips-amaryllis-for-the-holidays/.
Home gardeners have three options for propagating Amaryllis: from seed, through bulblets (sometimes referred to as offsets) and via cuttage. I frequently propagate Amaryllis using bulblets because I don’t want the “baby bulbs” to go to waste. This is a straightforward and simple process and has allowed me to grow enough Amaryllis bulbs to give to friends as gifts.
After the danger of frost, I move my potted Amaryllis bulbs outside for the summer months. I bring them in just prior to the first frost, place them in my garage for a dormant period of about two months and allow them to dry out. At the conclusion of the dormant period, I remove dried foliage and inspect the potted bulbs prior to repotting them, usually into larger pots to accommodate the growth that occurred over the summer. This is when I often find bulblets growing from the sides of the mother bulbs.
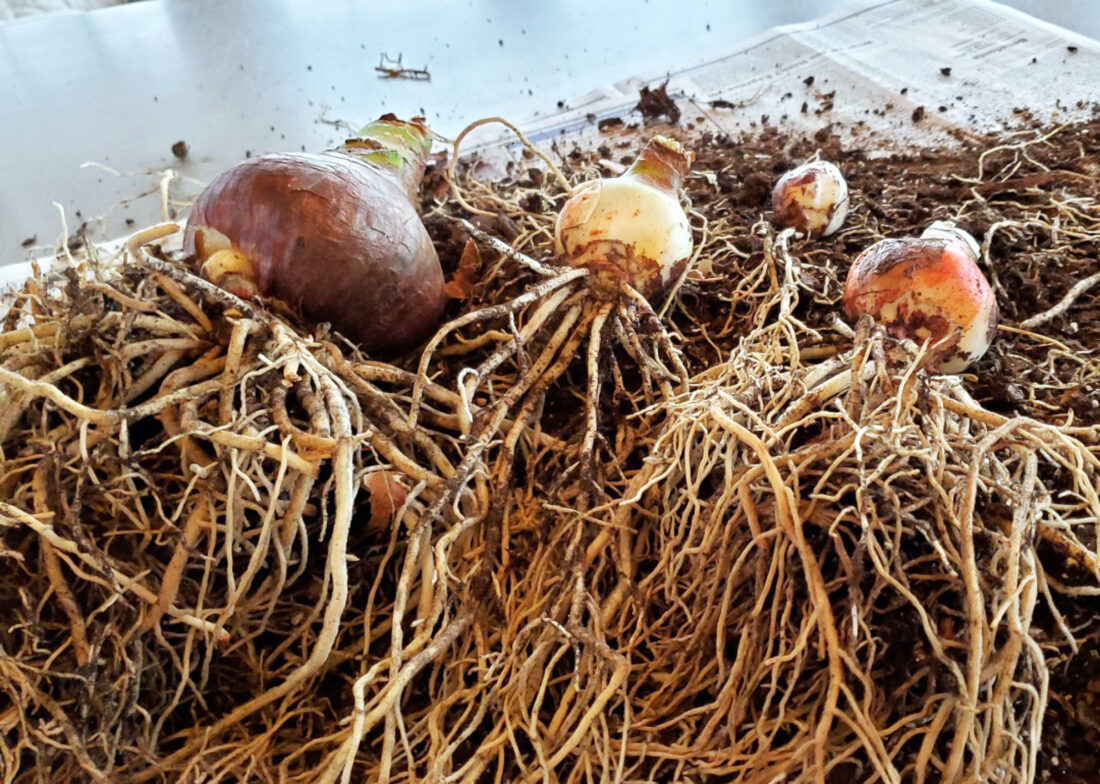
PHOTO BY DEBRA BURROWS The original bulb and bulblets separated with roots preserved.
To begin repotting and propagating, I gently remove the entire root ball from the pot. If bulblets are present, I separate the bulblets and their roots from the mother bulb using my hands, being careful to avoid damaging roots. By preserving as many roots as possible, the bulbs will not need to use as much energy to grow new roots and can instead channel that energy toward top growth and flower production.
Once the bulb and bulblets are separated, I select new pots based on the size of the bulbs and bulblets. The pot must have good drainage holes and should be about twice as tall as the bulb and wide enough to allow about two inches from the sides of the bulb to the sides of the pot when the bulb is placed in the center of the pot. Amaryllis like to be somewhat pot bound, so it’s important to allow some room for root growth, but not too much.
Because Amaryllis grow tall, the pot should be heavy enough to support the top growth without tipping over. I use heavy clay pots to avoid tipping. If using lighter weight pots, such as plastic, the bottoms of the pots can be filled with several inches of pebbles to add stability, or the pot can be placed inside a heavy decorative container, so long as it will be able to drain. Good drainage is essential.
The bulb should be placed in the pot so that approximately one third to one half of the bulb is above the surface of the potting soil. Care must be taken not to plant the bulb too deeply. Begin by placing small stones or a coffee filter over the drainage holes in the bottom of the pot to prevent the soil from seeping out. Place a few inches of potting soil in the pot and press firmly. Then place the bulb into the pot, allowing the roots to spread out under the bulb and holding the bulb at the proper height to ensure that at least one third of it remains above the surface, fill the pot with potting soil and tamp lightly, being careful not to damage roots.
Once planted, the new pots should be watered, allowed to drain thoroughly, and then placed on a sunny windowsill or other bright location. Do not water again until about two inches of growth have sprouted from the bulb. Allow the soil surface to dry out between waterings and be sure the pot drains well and is not sitting in a saucerful of water for a prolonged period. While the re-potted mother bulb will likely produce flowers in the coming months, the bulblets may take one to two years to increase in size and bloom.
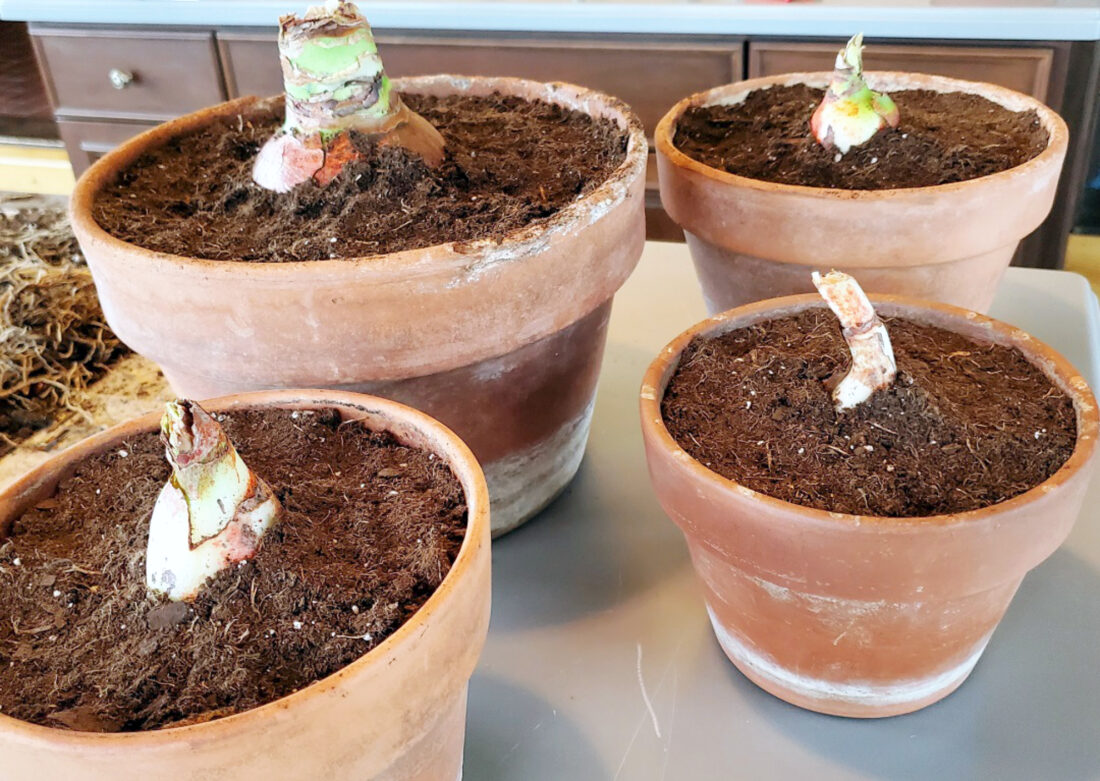
PHOTO BY DEBRA BURROWS The repotted bulb and bulblets.
I’ve found bulblets to be an easy and inexpensive way to propagate the Amaryllis bulbs that brighten my home during the dreary winter months. Propagating from seed and cuttings requires a bit more effort. Those interested in learning about those methods of Amaryllis propagation can find more information from the University of Florida at https://edis.ifas.ufl.edu/publication/EP060 .
In addition to the ease and cost savings, propagating from bulblets can be a more sustainable approach to enjoying Amaryllis in our homes each winter. Rather than treating them as annuals and buying new ones each year, we can produce our own and in so doing, conserve resources.
— — — —
Debra C. Burrows, PhD, is a retired Penn State Extension Educator and a certified Master Gardener. She can be reached at dcb3@psu.edu.
Garden
Annuals or perennials?
Soil is the foundation of your garden. Keep it healthy!
How to save money on garden gear with some creative recycling

Nobody said vegetable gardens must be in the backyard. Put them out front if it’s sunny
Master Gardeners open Garden Hotline for the 2026 season
7 signs of spring allergies
METRO — Few things are more deflating than finally venturing outdoors after a long winter of cabin fever, only to ...